Thai-style Drunken Noodles

drunken

Ah, drunken noodles. No, the noodles themselves aren’t drunk; There’s no alcohol in the dish, contrary to what you may be thinking. Instead, the name refers to the state people are often in when they’re eating these noodles. What drunk doesn’t love garlicky, spicy, salty food?

And really, if you’re not a fan of garlic or chile heat, then don’t make this. Don’t leave out the garlic because your mom doesn’t like it, or only put in half a seeded jalapeno because you don’t like heat. I’m sick of seeing comments on blogs and recipe sites where people explain how they changed numerous major components of a dish before they’d think about trying something. I don’t believe that recipes are gospel, by any means, but you can’t completely omit or change a dish’s major flavor profile. And in this case, that means garlic and chiles (and it could be argued, fish sauce).

Rant aside, this is a super easy and fast meal, great for weeknights. Just make sure to take some breathmints to work the next day.

Drunken Noodles

1 14 oz package of wide rice noodles
6 cloves of garlic, finely chopped or minced through a press
1/4 c Thai chiles, chopped (alternately, use 5-7 serrano chiles if Thai are not available)
1 lb ground chicken or pork
1/3 c fish sauce
1/4 c soy sauce
1/4 c Golden Mountain sauce, or more soy sauce
2 T sugar
2-3 cubanelle or Anaheim peppers, sliced
Thai basil, to taste

1. Cook noodles in boiling water until cooked, but still firm. Time it so the noodles are done the same time as the sauce/meat.

2. Add a little vegetable oil to a wok, then add your ground meat. Stir fry over high heat until done, then add garlic, chiles and peppers. Stir fry until peppers are tender, about 2-3 minutes.

3. Add sauces and sugar, and bring to a simmer. Toss noodles into the wok, and combine with sauce. If needed, cook 1-2 minutes more in the sauce in order to cook noodles to your liking.

4. Serve with chopped Thai basil and extra chiles, if desired.

Share Button

Chocolate Chip Cookie Bars

cookiebars

Next time you reach for a box of brownie or cookie mix…STOP! Make these instead. They’re just as fast as a mix, I promise. And chances are you’ll already have all the ingredients already in your pantry if you bake more than once a year. The recipe (from Cook’s Illustrated, once again) makes a 9×13-inch pan that’s just the right thickness, and has the perfect ratio of chocolate to dough.

This is also perfect if you’re feeling lazy but really want chocolate chip cookies. Because who wants to spoon out dough and bake in batches? Not to mention if you’re a fan of chewy, soft cookies, then this is also a recipe for you. OK, it’s really a recipe for everyone, I guess. It’s chewy, chocolatey, one-bowl, super fast and simple. What’s not to love?

Chocolate Chip Cookie Bars

2 1/8 c AP flour
1/2 t salt
1/2 t baking powder
12 T butter
1 c brown sugar
1/2 c sugar
1 egg
1 egg yolk
2 t vanilla
2 c chocolate chips (about one 12 oz bag)

1. Preheat oven to 325. Melt butter in a large microwave safe mixing bowl.

2. Add sugars and mix until combined. Add eggs and vanilla and mix well.

3. Dump in your dry ingredients except chips, and fold together with a spatula or wooden spoon, just until combined. Don’t overmix or the gluten will develop and make the cookies tough. Fold in the chocolate chips.

4. Spread in greased 9×13 pan (the dough will be a little greasy, but don’t worry). Bake until just set in the middle, 27-30 minutes.

Share Button

Vanilla Macerated Strawberries

strawberries

This recipe, if you can even call something this simple a recipe, is all about a technique that also happens to be one of my favorite words: macerate. Isn’t that a lovely word? It evokes what happens when you macerate fruit; it gets all juicy and a little squishy and all the goodness runs out to make it’s own syrupy sauce. Yum.

Again, this is another thing that doesn’t really have a recipe, but I’ll do my best. Serve it over vanilla ice cream as we do most of the time, or in strawberry shortcake, or in a yogurt parfait, or on oatmeal, or on pancakes or waffles…You get the idea. It’s good on everything.

Vanilla Macerated Strawberries

strawberries, sliced
white sugar, to taste, but at least a couple tablespoons
half a vanilla bean

1. Slice the half vanilla bean in two lengthwise, then scrape the seeds into a bowl with the strawberries and sugar. Mix thoroughly, then let sit on the counter or in the fridge for 30 minutes. Mix again, then serve. The sugar will bring out all the juices from the fruit and create a syrup. You don’t have to eat this right away, but the fruit breaks down the longer it sits, so I usually use it within a day, otherwise the strawberries start losing their color and get mushy.

Share Button

Blueberry Crisp

crisp

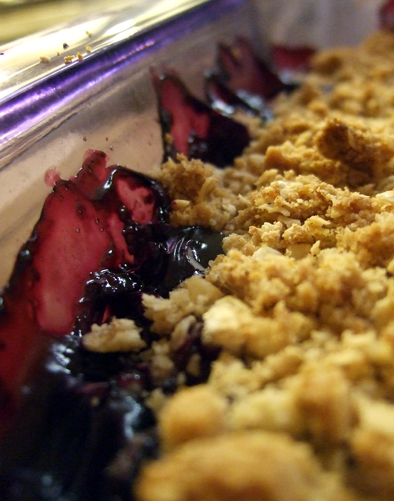
Blueberries were on sale at Sendik’s, 4 pints for $5. Not too shabby. I bought them before I knew what I was going to do with them…An impulse buy I guess. In the end I decided to make crisp, as oppossed to cobbler, buckle, crumble, grunt or whatever other regional variation of fruit+carbs. I almost always have everything already on hand for crisp, I love oats, and it’s super easy. Crisp is a great way to use up those impulse berries you buy this summer.

This is a general recipe as I never really measure crisp ingredients. For the fruit, if you like it thicker, add more cornstarch. If your berries are sour and not ripe, add a bit more sugar. For the topping, you’re looking to add enough butter that it turns into wet, coarse sand. If you squeeze it together in your hand, it will hold it’s shape, then crumble into large chunks.

Blueberry Crisp

4 pints blueberries, washed and picked over
1/2 to 3/4 c sugar, to taste
3-4 T cornstarch
1 T lemon juice
2/3 c flour
2/3 c brown sugar
2 t cinnamon
1/2 t salt
1 1/2 c rolled oats
1 stick butter, chilled and diced

1. Preheat oven to 350. Combine fruit, sugar, cornstarch and lemon juice in a bowl. Pour into a 9×13 pan.

2. Combine flour, brown sugar, cinnamon, oats and salt in a bowl. Add chilled butter chunks and work with fingers, fork or pastry cutter until butter is evenly distributed and mixture holds its shape when squeezed. Squeeze mixture, then crumble coarse chunks over the fruit. Bake until browned and bubbly, 30-40 mintues.

Share Button

Bucatini all’Amatriciana

bucatini1

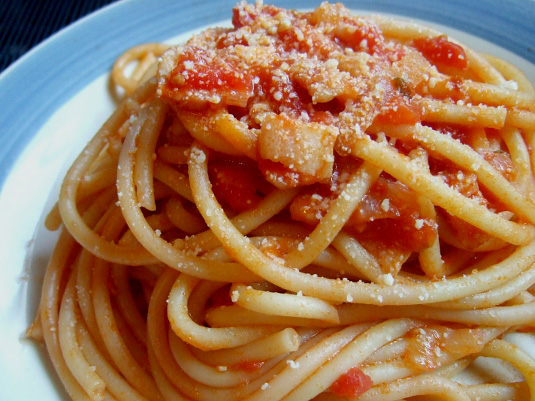
This is a case of do as I say, not as I do. (Though, if you do as I do, it’ll still turn out extremely tasty.) Traditionally, this is made with guanciale or pancetta, but I used leftover bacon from carbonara a couple weeks ago (which, coincidentally, should also include guanciale or pancetta over bacon). If you can’t find, or don’t want to bother using either of those, just use bacon. Traditionally, this recipe calls for romano cheese, but I use parmesan because I always have it on hand. It’s still good, just not authentic.

I love this pasta because it’s one of those Italian dishes that’s so simplistic. A few ingredients, a quick pan sauce, and dinner’s ready. The quality of those ingredients really matters though, so don’t skimp and use Kraft cheese or crappy canned tomatoes.

Unfortunately, while I love this for it’s simplicity, Nick finds it boring and lacking in the meat department. But don’t listen to him, this is perfect for summertime when it’s hot out and you want something fresh tasting that won’t heat up the kitchen for hours on end. You can easily keep all of the necessary ingredients on hand for a quick, cheap meal.

Bucatini — a fat strand of spaghetti that’s hollow like a straw — isn’t necessary, but we both enjoyed it. Takes you by surprise when your first instinct is to slurp like spaghetti, but it doesn’t work because of the hole!

Bucatini all’Amatriciana

1 lb bucatini or spaghetti
1/2 lb guanciale, pancetta or bacon, in 1/2 inch chunks or strips
1 large white onion, slicedbuc
3 cloves garlic, minced
1 t red pepper flakes
28-32 oz can whole tomatoes (preferably San Marzano)
Pecorino romano or parmesan cheese, for serving

1. Cook pasta according to package directions.

2. While the pasta water is coming to a boil, saute onions in a bit of olive oil over medium heat until slightly soft, about 3 minutes. Add garlic, red pepper flakes and guanciale, pancetta or bacon and continue to cook over medium heat until meat is rendered and becoming slightly crisp on the edges, 6-8 minutes more.

3. Add canned tomatoes and juice, breaking tomatoes up with your hands. Simmer until pasta is done, at least 8 minutes. Season with salt and pepper.

4. Combine sauce and hot drained pasta. Serve topped with romano or parmesan cheese.

Share Button

Parmesan Pilaf

pilaf

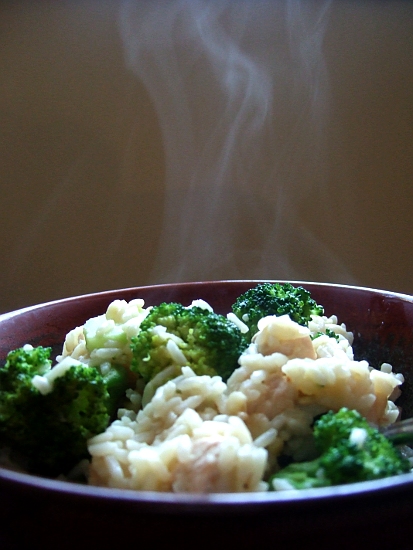
This is a recipe that was printed on the back of an Uncle’s Ben’s bag years ago. We used to eat it at my mom’s a lot, as it’s easy, fast, relatively inexpensive and good for you (perfect for weeknights!). They don’t make the Uncle Ben’s pilaf mix we used to use, but I just subbed regular white rice with some orzo pasta and it works well. I top mine with a ton of fresh lemon (or lime, if lemons are too expensive) because I’m a lemon freak and anything with broccoli gets doused in lemon.

I didn’t make this for Nick  because I figured he wouldn’t like it too much — too much broccoli and flavors that are too subtle. But surprisingly, he requests it now. The recipe as it is makes plenty of leftovers, which we love. You can easily halve the recipe if you want.

Parmesan Pilaf

1.5 lb chicken breasts, cut into bite-size pieces
2 1/2 c long grain white rice
1/2 c orzo
6 c chicken broth
4 T (half stick) butter
6 garlic cloves, chopped
4 stalks fresh broccoli
2 handfuls grated parmesan

1. Brown the chicken in a Dutch oven or other pot with a tight fitting lid. Remove from pan.

2. Add butter and garlic over medium heat, saute for a minute until fragrant and butter is foamy. Add rice and toast in the pan for 4-5 minutes, until the grain obsorb the butter and turn nutty smelling.

3. Add the chicken broth and the reserved cooked chicken. Scrap the bottom of the pan to release the brown stuff (fond). Cover and cook for 12 minutes.

4. Meanwhile, chop your broccoli. I like somewhat large florets. I also peel the broccoli stems with a paring knife: slip the knife under the fibrous part of the peel, then hold it against the kinfe with your thumb and pull. It will peel off down the stem. The heart of the stems will be tender and lovely once cooked.

5. After 12 minutes of cooking, add the orzo to the pot and stir. Top with the broccoli, cover, and cook another 8-10 minutes. The broccoli will steam on top of the rice.

6. When rice and broccoli are tender, turn heat off and stir in parmesan. Season with S+P.

Share Button

Crock Pot Pulled Pork

pork

Sometimes you just want a little bit of summer all year long. That’s when it’s time for picnic’y foods!

This is perhaps the easiest recipe, one of the most versatile, and very cheap. You can’t screw it up. It’s impossible. You can make any number of dishes out of it when you’re done: BBQ pork sandwiches, a topping for nachos, tacos, carnitas, use some to make a pork stew, perogies, a porky version of shepherd’s pie….You get the idea. It’s stolen from the lovely goons over at the SomethingAwful forums. And while that can be a scary, scary place, the food forum is actually quite good and full of food snobs where I fit in quite comfortably.

Crock Pot Pulled Pork

1 pork shoulder, whatever size you can fit in your pot
Worchestershire sauce, about 1/4 cup, depending on the size of your roast
Light brown sugar, enough to cover your roast
Lots of salt

Plop your roast in your crock pot. Cover that baby with worchestershire, until there’s a little pool in the bottom of the pot. Pat brown sugar liberally all around the roast until it’s covered. Put the lid on, turn it on low, and cook for 10-12 hours. If you have a relatively small roast, check it at 8 hours. If it’s falling apart, it’s done. If you’re impatient, you could probably get away with cooking it on high for 5-6 hours, but low and slow is the way to go.

Once it’s done, take it out of the pot and let it rest on a cutting board until it’s cool enough to handle. Then pull into shreds and salt liberally. And I mean liberally. You will use more salt than you think you need.

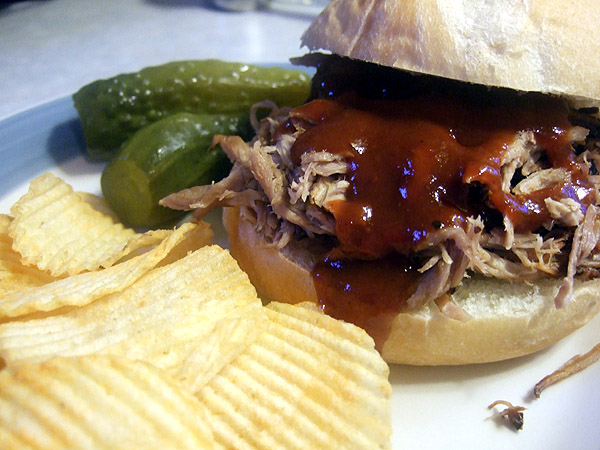
Then, do whatever you want with it! I usually just keep it plain and add BBQ sauce to it as needed, so I can use the leftovers for tacos or whatever else. If you’re going for picnic’y, then serve with chips and pickles, of course.

Share Button

Shortcut Pasta Arrabiatta

pasta

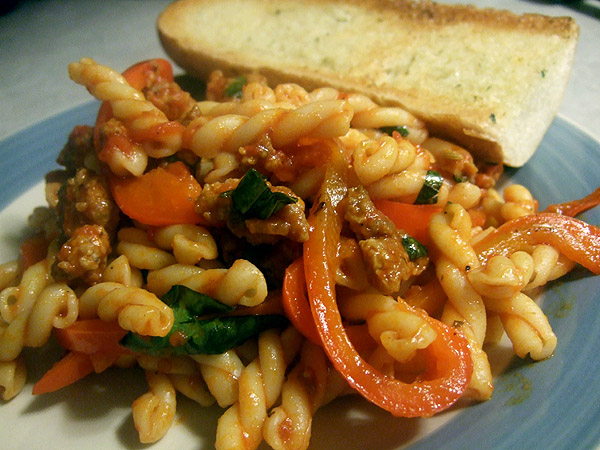
Sometimes I just don’t feel like cooking. (Gasp, right?!) Or I just plain don’t have much time to cook. In those cases (and when I’m feeling rich), I go and buy a bottle of Rao’s brand arrabiatta sauce. Yes, I know it’s $8/bottle, but it’s so good. I don’t do this very often, only when it’s on sale. If you don’t want to spend that money, you can easily substitute canned crushed tomatoes (san marzano, please), along with some garlic, lots of red pepper flakes and a bit of dried oregano and basil.

Cheating Pasta Arrabiatta with Sausage

1 lb short pasta, I used Barilla gemelli
1 jar arrabiatta pasta sauce, I use Rao’s
1 lb hot Italian sausage, links or bulk
1 red bell pepper, sliced
fresh basil
parmesan

1. Boil water, add salt, and cook pasta to al dente, timing it so the pasta is done cooking about when the sauce is ready.

2. For sauce, add bell pepper strips to pan over high heat and sear until small black marks appear on the skin. Remove from pan.

3. Remove sausage from casings if in links, and brown in the same pan. Ad jar of sauce once sausage is cooked through, and simmer over medium-low for 5 minutes, or until pasta is cooked.

4. Drain pasta, then return to the pot. Add sauce and sausage, along with bell pepper strips and fresh torn basil. Stir to combine. Add parmesan on the plate to taste.

Serve with garlic bread and/or salad. (My garlic bread is simple and slightly ghetto…Halve French or Italian bread, spread with warmed butter, sprinkle with garlic salt. Pop under the broiler until browned and crisp.)

Share Button