Homemade Pizza, part 1

pizza1

Last weekend I decided to take on a new project, inspired by this pizza making forum. I’ve visited that forum randomly for the last year or so, but never attempted making any because I lacked some necessary tools, especially a baking stone. But, lovely Nick remedied that this year for my birthday and the stone now has permanent residence in my oven. (After making my first pizzas, however, I realize I now need a pizza peel and a kitchen scale…)

But back to that forum. Those people are crazy. Some of them must have OCD. Ten thousand posts on a pizza making forum, most at least 300 words long? Admitting you have 19 pages of notes on how to modify one crust recipe? Obsessively calling and emailing Giordano’s in order to reverse engineer their crust? Calculating crust thickness using pi and algebra only an engineer would understand? Sometimes I read this stuff and think, “What the fuck are these people talking about? Do they even have lives or jobs?” And other times, I think, “These people are frickin’ geniuses!”

Because damn, they can make some good lookin’ pizzas. So, they must be doing something right. Unfortunately, I did most everything on my first pizzas that they’d consider “wrong.” I made a quick-rise dough recipe instead of letting it ferment 3 days, I used volume measurements instead of weight (told you I need that kitchen scale), and I used a supermarket block of mozzarella instead of the wonderful buffalo mozz. But you know what? My pizzas still turned out damn good. And I see this as just the start of an obsession with making great pizzas. Maybe I’ll even start using baker’s percentages and calculating hydration ratios too!

The crust and the sauce are the most important parts of the pizza if you ask me. Either one of those things sucks, and so does your pizza. Cheese and other toppings are basically in the eye of the beholder, so to speak. We did basic pepperoni, Italian sausage and black olive pizzas, with a local cheesemaker’s block part-skim mozz. I plan to make buffalo and BBQ chicken pizzas soon, because I’m a sucker for those things. A pizza stone is ideal, but if you don’t want to spend the money, get yourself a pizza screen. Since I don’t have a peel yet, I started the pizzas on the screen, then transferred them to the stone about 7 minutes into baking. You can cook it on the screen for the entire cooking time if that’s all you have. It’s still much better than a sheet pan or those round perforated pizza pans.

For the sauce, most people on the pizza making forum swear by not cooking the sauce before you cook the pizza. I was a little wary, but it turned out really well. I used a can of imported San Marzano tomatoes, which I had to buy a new brand of because the store was out of the brand I normally buy. I wasn’t too happy with the quality, but it still turned out well. I can’t wait til I have great tomatoes again.

Eventually I’ll start using baker’s percentages, hopefully, but for now here’s an easy beginner’s volume-based recipe. I didn’t measure ingredients for the sauce, but use your best judgement; that’s why you have judgement. It’ll turn out great.

Quick-Rise NY-style Pizza

Crust for one 12-inch pizza:pizza3
1 3/4 c AP flour (high-gluten flour is best, but AP will work in a pinch)
~ 1/2 c water at 90 degrees F
1/2 t salt
1/2 t olive oil
1/2 t active dry yeast, plus a pinch

1. Dissolve salt in water in bowl of mixer fitted with the dough hook. Mix yeast into flour in a bowl.

2. Turn mixer on low, and add flour slowly. Eventually, it will come together around the hook and away from the sides of the bowl. If it doesn’t come together in one mass after a couple minutes, it’s probably too dry. That is the problem with volume measurements. Add more water, a scant teaspoon at a time, until it comes together into a ball. It shouldn’t be sticky, but also not dry to the touch. It just takes intuition. When you think it’s about right, add your olive oil and continue kneading it (the mixer is doing the kneading now) until combined.

3. Coat your hands in olive oil. Remove from the bowl, and knead it a few times on the counter. The olive oil will keep it from sticking to you or the counter, though it shouldn’t really be sticky anyway. If it’s sticky, it’s too wet and you should have added more flour! Bring the dough together into a smooth ball, making sure it’s coated in a thin layer of olive oil before placing it in a bowl. Set aside at room temperature for 2 hours. Dough will double in size.

4. To make pizza, remove dough from the bowl. Pat out on the counter into a round, then you can use your knuckles to stretch it thin. It will naturally have a ring of thicker dough around the edge that will be the crust. I found this dough to be very easy to work with. Transfer to your screen or peel, top with your sauce and toppings and bake at 450 F for 15-17 minutes. If using a stone, preheat the oven for 45 minutes beforehand, and use the lowest rack.

Sauce:pizza2
1 ~28 oz can San Marzano or other quality whole peeled tomatoes
1/2 t dried oregano
1/4 t dried basil
2 T tomato paste
1 clove garlic, minced
1/4 t red pepper flakes
salt to taste

1. Crush the tomatoes by hand into a bowl. Remove any stray skin or fibrous stem parts. Do not add any extra puree or juice from the can.

2. Add the other ingredients except tomato paste, then pulse with a stick blender or in a food processor, blender, or food mill. I used my stick blender and it was quick and easy.

3. At this point, judge the consistency. Mine was pretty thin and watery just from the liquid in the tomatoes. If it’s too thin, strain through a fine seive for a minute or two until the sauce left in the strainer is the right consistency (or slightly thin, the tomato paste will help thicken slightly).

4. Return it to a bowl if you strained it and add the tomato paste. I needed to add some paste because the tomatoes were not the best quality and were obviously not the ripest. The paste made my sauce thicker and brighter. Also, if you taste the sauce, be aware that the raw garlic will not taste good. This was off-putting, but the cook time in the oven took care of that, don’t worry. Let the sauce sit while the dough rises for the flavors to blend.

Share Button

Thai-style Drunken Noodles

drunken

Ah, drunken noodles. No, the noodles themselves aren’t drunk; There’s no alcohol in the dish, contrary to what you may be thinking. Instead, the name refers to the state people are often in when they’re eating these noodles. What drunk doesn’t love garlicky, spicy, salty food?

And really, if you’re not a fan of garlic or chile heat, then don’t make this. Don’t leave out the garlic because your mom doesn’t like it, or only put in half a seeded jalapeno because you don’t like heat. I’m sick of seeing comments on blogs and recipe sites where people explain how they changed numerous major components of a dish before they’d think about trying something. I don’t believe that recipes are gospel, by any means, but you can’t completely omit or change a dish’s major flavor profile. And in this case, that means garlic and chiles (and it could be argued, fish sauce).

Rant aside, this is a super easy and fast meal, great for weeknights. Just make sure to take some breathmints to work the next day.

Drunken Noodles

1 14 oz package of wide rice noodles
6 cloves of garlic, finely chopped or minced through a press
1/4 c Thai chiles, chopped (alternately, use 5-7 serrano chiles if Thai are not available)
1 lb ground chicken or pork
1/3 c fish sauce
1/4 c soy sauce
1/4 c Golden Mountain sauce, or more soy sauce
2 T sugar
2-3 cubanelle or Anaheim peppers, sliced
Thai basil, to taste

1. Cook noodles in boiling water until cooked, but still firm. Time it so the noodles are done the same time as the sauce/meat.

2. Add a little vegetable oil to a wok, then add your ground meat. Stir fry over high heat until done, then add garlic, chiles and peppers. Stir fry until peppers are tender, about 2-3 minutes.

3. Add sauces and sugar, and bring to a simmer. Toss noodles into the wok, and combine with sauce. If needed, cook 1-2 minutes more in the sauce in order to cook noodles to your liking.

4. Serve with chopped Thai basil and extra chiles, if desired.

Share Button

Swedish Meatballs

swedish

Hi everyone, remember me? It’s been a while! I’ve had some technical difficulties with my computer lately. Namely, with my free photo editing program, Gimp. Fo some unknown reason, it keeps crashing on me whenever I try to adjust the levels on any photo. Quite annoying. I’ve even reinstalled it a couple times. Anyone got a copy of Photoshop they’d like to share with me? (Hey, it’s worth a shot!) As it is, I edited this photo at work, since I’ve got all that Adobe goodness there. Shhhhhh! (I’m also having issues now that the sun is setting so early. I have no place to put a makeshift lightbox at the moment.)

IKEA is one of my favorite places. It’s cheap. It’s kitschy. It’s colorful. It’s cheap. Did I mention it’s cheap? Of course, with cheap prices comes cheap manufacturing, but I’ve had the Poang chair for many years and it’s good as new. I’m on my second garlic press from IKEA, though. The little holey part on my first one broke a year ago…The metal actually cracked into pieces. Weird. But I soon got a replacement!

Of course, I eat Swedish meatballs there almost every time. It’s just one of those things you have to do (unless you opt for a giant $1 cinnamon roll instead). Anyone remember when they still had the Manager’s Special? I think it was 9 meatballs, potatoes, a soup and a soda for $5. Ridiculously awesome.

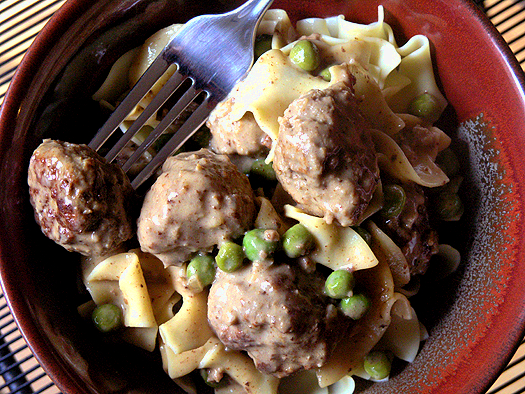
Since I’m not living in Chicago anymore, I hardly ever get to IKEA now. So that meatball craving got pretty strong after a while. And then I ran across a recipe for IKEA-style Swedish meatballs, supposedly translated from a Swedish language IKEA cookbook. Score! And I must say, these turned out better than the frozen, reheated ones you get at the cafe (though, you’ll probably miss the plastic ambiance and tray carts). Instead of potatoes, I like egg noodles. And I mixed in some frozen peas, since you know, somewhat fatty meat on top of starch isn’t exactly the best meal health wise. I didn’t have lignonberries when I made the recipe, but I’m happy to report that since making these, I picked some up at IKEA. Not necessary, but tasty. I imagine Swedish meatballs would also be tasty with leftover cranberry sauce from Thanksgiving.

Swedish Meatballs

3/4 lb lean ground beef
1/2 lb ground pork
1 egg
~1/2 c cream or milk
1 small onion, finely chopped
1/4 c breadcrumbs
2 small potatoes, peeled, boiled, mashed and cooled
1/2 t allspice
oil and butter for frying

For sauce:
1 15 oz can beef broth or stock
2/3-1 c cream
3-4 dashes worchestershire

1. Saute the onion in a small amount of butter until just browning.

2. In a large bowl, combine well all meatball ingredients except beef and pork. Add meats, then mix gently to combine without packing the meat down. Season the mixture generously with salt. You’ll use more than you think you need. If you’re unsure, heat a pan and cook a pinch of the meat to taste, then reseason the mixture. Form into golf ball sized meatballs.

3. Heat oil and butter combination in a large skillet over medium heat, and fry meatballs on all sides until brown and cooked through. You’ll have to work in batches so you don’t crowd the pan. Remove the meatballs from the pan.

4. Remove any excess oil from the pan, then deglaze with the beef broth, scraping the browned bits off the bottom of the pan. Simmer until reduced a bit, then add the cream and worchestershire. Simmer gently until slightly thickened, then season to taste.

5. Add your cooked meatballs to the sauce and heat through. Serve with egg noodles, potatoes, lignonberries, etc.

Share Button

Peanut Butter Brownies

pbbrownies

I probably don’t need to say it, but holy decadent, batman!

I had these beautiful brownies bookmarked over at Loves to Eat for the longest time, just waiting for an excuse to make them. I figured Labor Day, and specifically my friend Lynn’s party, was good enough for me. As an added bonus, other people would be at this party, ensuring I wouldn’t eat the entire pan myself. Thanks, other people.

These remind me of the chocolate peanut butter cake I’ve made, but with much less effort and time expenditure. But the payoff is still awesome. The brownie base is super fudgey and rich, so I cut these into 24 squares and one is plenty (at least for a couple hours!). The peanut butter filling is really just frosting, which works for me. And the topping originally didn’t call for any cream, but I wanted something that wouldn’t set up as a hard layer, and adding a bit of cream to make a ganache worked out perfectly. The peanut butter layer is soft and silky and the ganache is smooth but still a bit soft, even from the fridge.

Make these. You know you want to.

Peanut Butter Brownies

Brownie layer
1 c butter
2 c sugar
3 eggs
3 t vanilla
2/3 c cocoa powder (Dutch process is fine)
1 c AP flour
1/2 t salt
1/2 t baking powder

PB filling
1/2 c butter, softened
1/2 c creamy peanut butter
2 c powdered sugar
~2 t milk

Ganache topping
1/4 c peanut butter
2 c semisweet chocolate chips
1/4 c butter
1/4 c cream

1. Preheat oven to 350. Line a 9×13 pan with aluminum foil to make a sling, or use parchment, and coat with cooking spray. I only used a heavy dose of cooking spray, and that still wasn’t enough for these fudgey brownies, so I recommend lining the pan for once.

2. For the brownies, melt the butter in a large saucepot. Remove from heat, add the sugar and stir to combine. Beat in eggs and vanilla until homogeneous. Add cocoa, baking powder and salt and combine. Add flour last and stir until combined. Spread into pan and bake 25-30 minutes. Cool completely before frosting.

3. For peanut butter filling/frosting, combine the ingredients and beat until smooth. Add more milk if necessary to make it spreadable. Try not to eat all the frosting before your brownies are cool.

4. For the ganache, combine the ingredients in a double boiler or in a microwave safe bowl. Melt together and combine.

5. Once the brownies are cool, spread the frosting on top. Place them in the fridge for at least 30 minutes until the frosting sets up a bit. Pour the ganache over the top and spread gently. Return to the fridge until set. I like to keep them in the fridge and serve cold because the brownies are so fudgey.

Share Button

Meat and Potatoes Night

steakpoivre

Nick requested steak and baked potatoes last Saturday night. I’m not the biggest fan of either, frankly. I really have to be in the mood for steak, and baked potatoes have never wowed me. The only real steak-and-potatoes-meal I crave is French-style steak frites from one of my favorite restaurants, Chez Jacques.

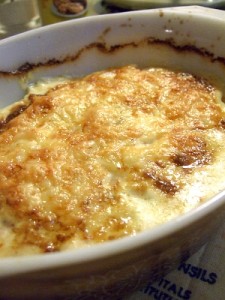
So, to compromise, I made steak au poivre with brandied cream sauce and potatoes gratin with jarlsberg cheese and cream from a local farm. Even if you’re craving a manly man steak and baked potato, how on earth can you say no to that?! Yeah, Nick enjoyed it. So did I, but I think I’m steaked out for the next 6 months or so.

Once again, the steak recipe is adapted from Cook’s Illustrated. The potato recipe is a mish-mash from memory from last Christmas and random recipes online. I don’t remember exactly what recipe I used last year, but it’s pretty difficult to screw up, don’t worry. But whatever you do, don’t underestimate the amount of baking time those potatoes need. I used two smallish Pyrex dishes, and they still needed about an hour and 15 minutes to just cook through. We were impatient, but they could have cooked another 15 minutes longer for a more mashed-potatoes consistency.

Steak au Poivre with Brandied Cream Sauce

Sauce (I almost doubled the amount of sauce the original recipes makes)
4 T butter
2 shallots, minced
2 c beef broth (must be low sodium as it reduces)
1 c chicken broth (also low sodium)
2/3 c heavy cream
2/3 c brandy
2 t lemon juice (I used lime because that’s what I had, no problem)

Steaks
4 strip steaks (or however many you’re serving)
1 T black peppercorns, crushed with the bottom of a heavy pot
salt to season

1. Heat 1 tablespoon butter in 12-inch heavy-bottomed skillet over medium heat; when foaming subsides, add shallot and cook, stirring occasionally, until softened, about 2 minutes. Add beef and chicken broths, increase heat to high, and boil until reduced to about 3/4 cup, about 8 minutes. Set reduced broth mixture aside. Rinse and wipe out skillet.

2. Season the steaks with salt on both sides, then rub and pat the peppercorns evenly onto one side of each steak. Sear on unpeppered side first, then turn and continue cooking until it’s done to your liking. (CI recommends using an instant-read thermometer to check for doneness: 120 degrees for rare, 125 degrees for medium-rare, and 135 to 140 degrees for medium.) When done, place steaks on cutting board and tent with foil until the sauce is done.

3. To make the sauce, pour reduced broth, cream, and  brandy into now-empty skillet; increase heat to high and bring to boil, scraping pan bottom with wooden spoon to loosen browned bits. Simmer until deep golden brown and thick enough to heavily coat back of metal tablespoon or soup spoon, about 5 minutes. Off heat, whisk in remaining 3 tablespoons butter, lemon juice and any accumulated meat juices. Serve immediately over steaks. And don’t forget the bread to sop up the extra sauce!

Potatoes Gratin with Jarlsberg gratin

Yukon gold potatoes, sliced thinly on a mandoline, enough to fill whatever containers you’re using. For two medium Pyrex dishes, I used about 2.5 pounds.
Heavy cream
Chicken broth
Salt and pepper to taste
Freshly grated nutmeg
Jarlsberg or gruyere cheese, grated. I used about half a pound.
Parmesan, grated
1 clove of garlic
Butter

1. Combine cream and chicken broth at about a 2:1 ratio. You’ll want enough to come up about halfway up the sides of your layered potatoes in the pan. Don’t worry about guessing, you can easily just pour a bit more cream or broth over the potatoes if you need to.

2. Season the cream mixture with salt and pepper. Use more salt than you think you’ll need as potatoes love salt. Grate in a small amount of nutmeg.

cream

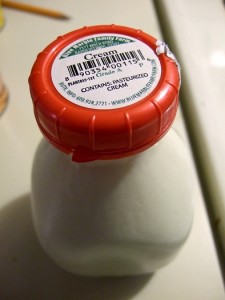
Fantastic cream from a local dairy

3. To prepare your dish, cut the clove of garlic in half and rub it all around the bottom and sides of the dish. Then rub with butter or coat with baking spray.

4. Place a layer of potatoes at the bottom of your dish. You’re aiming for about 3 layers, so use about 1/3rd of your potatoes. Top that with a sprinkling of both cheeses. Use the parmesan sparingly.

5. Keep layering for 3 layers of potatoes, then top with the last of your cheese. Pour the cream mixture over the potatoes and let it soak down into the bottom of the pan, it’ll take a moment. Pour more cream mixture if neccessary to come up about 1/2-2/3 the way up the potatoes. If you tip the dish a bit, you should see a pool of cream. If you don’t have enough of the mixture, just add a bit more cream or broth.

6. Dot the top of the dish with a little butter to help browning. Bake in preheated 350 degree oven, covered, for 30 minutes. Uncover, and continue baking until a knife can be inserted in the middle without resistance. Mine took about an hour and 15 minutes. The top will get golden brown and crunchy.

Share Button

Pumpkin Piecakes, Pecan Brittle and Stabilized Whipped Cream

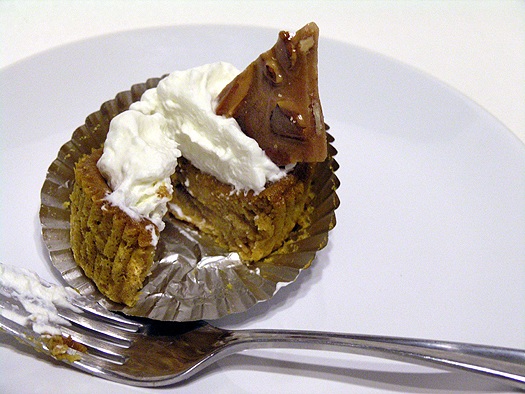
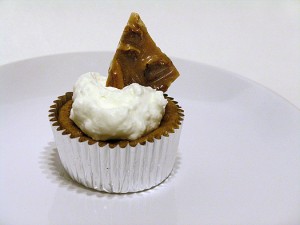
I wasn’t really sure what to call these. Pumpkin pie cupcakes is clumsy and implies a cupcake, which this really isn’t, except for the liner. This is more like a pumpkin pie without the crust. It’s pumpkin pie filling, with a little bit of flour to hold it together and leavener for just a bit of airiness. The edges set up into almost a cake, and the middle stays custardy. And because they fall in the center as soon as you take them out of the oven, they’re just begging for a dollop of whipped cream.

I made these for a work potluck because, having made them before, I knew they were easy to make and perfect for grab-and-go. The only problem was the whipped cream, which would have wept if I made it the night before. So that brings us to the stabilized whipped cream. It was the first time doing so, and I don’t believe I dissolved the gelatin completely before adding it, because there were a few little pearls of gelatin here and there. I doubt anyone but me noticed, though! It didn’t weep, though, so that was ultimately a success.

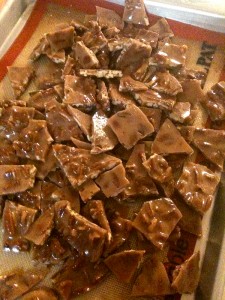
The pecan brittle was just a little extra something. And boy was it good. I debated using pumpkin seeds, but they were the same price as pecans, and frankly I couldn’t see myself using the leftover pumpkin seeds. So pecans it was. And what a good decision that was! The smell as you’re making the brittle is exactly like pecan pie. The smell is almost better than the finished candy, if you ask me!

I adapted the pumpkin recipe from this blog, but made a few key changes. First, I omitted the generic pumpkin pie spice in favor of my own spice blend. Second, I extended the baking time, because 20 minutes really left you with a mushy product. Yes, it’s custardy, but it should still be firm. Also, don’t be afraid of filling your cupcake liners almost full. Normally that’s a bad idea, but these puff only slightly, and more importantly, fall quite a bit when cooling.

Pumpkin Piecakes

1 15 oz can pumpkin puree
1/2 c sugar
1/4 c brown sugar
2 eggs
1 t vanilla
3/4 c half and half
2/3 c AP flour
1/4 t baking powder
1/4 t baking soda
1  t cinnamon
1/2 t ground ginger
1/4 t each allspice, cardamom, freshly grated nutmeg and salt

1. Preheat oven to 350. Line muffin tin with liners and coat lightly with cooking spray.

2. In a Kitchenaid or large bowl with a whisk, combine eggs and sugars. Add pumpkin, half and half and vanilla and combine.

3. Add your dry ingredients, and combine until smooth.

4. Fill liners almost full, then bake for 23-26 minutes until the top is no longer sticky to the touch. Cool, and serve with whipped cream. Makes a dozen.


Stabilized Whipped Cream

1 t unflavored gelatin
4 t cold water
1 c heavy whipping cream
powdered sugar to taste

1. Add gelatin to cold water in small saucepan and bloom until thick.

2. Cook over low heat until gelatin is completely melted and there are no little pearls of gelatin left. Cool slightly.

3. Whip cream until slightly thick, then pour gelatin into it while whipping slowly.

4. Add sugar to taste, then continue to whip until stiff.


Pecan Brittle

1 1/2 c sugar
1/2 c light corn syrup
2 1/4 c roasted, lightly salted pecans
2 T butter
1 t vanilla
1 t baking soda

1. Prepare the pan you will be pouring the candy into. Use a half sheet pan, or other large sheet pan with low sides. Use silpat if you have it, otherwise coat the pan with cooking spray or butter.

2. In a heavy saucepan or enameled dutch oven with a lid, combine the sugar, water and corn syrup. Cover the pot and bring to a boil over high heat. Swirl the pot occasionally to ensure the sugar melts evenly. Keeping the lid on will cause the steam to condense and drip back down the sides of the pot, preventing any sugar from recrystalizing. If you have no lid or crystals form, you can also wipe down the sides of the pot with water using a pastry brush.

3. Once boiling, insert candy thermometer and boil until it reaches 230 degrees, only about a minute later.

4. Add the pecans and stir constantly with a metal or silicon spatula until it reaches 300 degrees, about 15-18 minutes.

5. Remove from the heat, and immediately add the butter, vanilla and baking soda and stir quickly. It will foam and sizzle.

6. Pour down the center of your pan and spread out so the nuts are in an even layer. Let sit until cool, and break into pieces.

Share Button

Salmon Spread with Lemon and Dill

salmonspread

Why is it that the salmon that’s on sale never tastes very salmony?? If only Sendik’s had had their Alaskan coho on sale again, instead of Pick’n’Save’s farmed Atlantic. Oh well, sorry Trade Press, it’s more like Dill and Lemon Spread with Salmon.

Made with great salmon, however, this is a delicious recipe. As with a lot of my cooking, I don’t really use a recipe. There’s ingredients that I always use, then I just go from there. Here’s the recipe as best as I can remember from this batch.

Salmon Spread

1 lb (2 blocks) cream cheese (low-fat is fine)
1 lb fresh salmon, broiled until cooked, then flaked
4 T good quality butter
zest and juice of one lemon
2 T horseradish (not sauce)
2 T capers, drained
1/4 c red onion, minced
3 T chopped fresh dill
1-2 t fish sauce or worchestershire
S+P to taste

1. Leave the cream cheese and butter out to come to room temperature.

2. Cream all ingredients except salmon in a mixing bowl. Add salmon and mix to combine. Adjust any of the ingredients to taste. Chill and serve with crackers, bagels, rye bread or cucumber slices.

Share Button

Chocolate Chip Cookie Bars

cookiebars

Next time you reach for a box of brownie or cookie mix…STOP! Make these instead. They’re just as fast as a mix, I promise. And chances are you’ll already have all the ingredients already in your pantry if you bake more than once a year. The recipe (from Cook’s Illustrated, once again) makes a 9×13-inch pan that’s just the right thickness, and has the perfect ratio of chocolate to dough.

This is also perfect if you’re feeling lazy but really want chocolate chip cookies. Because who wants to spoon out dough and bake in batches? Not to mention if you’re a fan of chewy, soft cookies, then this is also a recipe for you. OK, it’s really a recipe for everyone, I guess. It’s chewy, chocolatey, one-bowl, super fast and simple. What’s not to love?

Chocolate Chip Cookie Bars

2 1/8 c AP flour
1/2 t salt
1/2 t baking powder
12 T butter
1 c brown sugar
1/2 c sugar
1 egg
1 egg yolk
2 t vanilla
2 c chocolate chips (about one 12 oz bag)

1. Preheat oven to 325. Melt butter in a large microwave safe mixing bowl.

2. Add sugars and mix until combined. Add eggs and vanilla and mix well.

3. Dump in your dry ingredients except chips, and fold together with a spatula or wooden spoon, just until combined. Don’t overmix or the gluten will develop and make the cookies tough. Fold in the chocolate chips.

4. Spread in greased 9×13 pan (the dough will be a little greasy, but don’t worry). Bake until just set in the middle, 27-30 minutes.

Share Button