Singapore Noodles

singaporenoodles

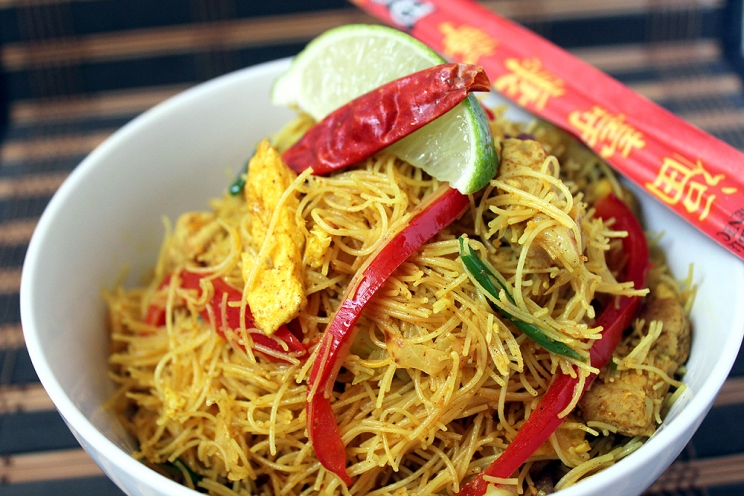
I had never been a big fan of Singapore noodles. Every version of this Chinese-American was bland, gritty and boring. Then, I tried the version at RuYi, a surprisingly good restaurant in the Potawatomi casino, and found it better than I had remembered. And more recently, I tried the version at Kim’s Thai to Go, my favorite Thai place located in Pacific Produce on the south side of Milwaukee, and that version was a revelation. It was bright with curry and heavily seasoned; a cross between Chinese noodle stir fry and Indian curry. 

So when I had a couple pork chops to use up before they expired, I decided to give Singapore noodles a shot myself. I cobbled together a few recipes around the internet, and followed Cook’s Illustrated’s general method. The verdict: a definite make again recipe.

Continue reading

Share Button

Homemade Pizza, part 1

pizza1

Last weekend I decided to take on a new project, inspired by this pizza making forum. I’ve visited that forum randomly for the last year or so, but never attempted making any because I lacked some necessary tools, especially a baking stone. But, lovely Nick remedied that this year for my birthday and the stone now has permanent residence in my oven. (After making my first pizzas, however, I realize I now need a pizza peel and a kitchen scale…)

But back to that forum. Those people are crazy. Some of them must have OCD. Ten thousand posts on a pizza making forum, most at least 300 words long? Admitting you have 19 pages of notes on how to modify one crust recipe? Obsessively calling and emailing Giordano’s in order to reverse engineer their crust? Calculating crust thickness using pi and algebra only an engineer would understand? Sometimes I read this stuff and think, “What the fuck are these people talking about? Do they even have lives or jobs?” And other times, I think, “These people are frickin’ geniuses!”

Because damn, they can make some good lookin’ pizzas. So, they must be doing something right. Unfortunately, I did most everything on my first pizzas that they’d consider “wrong.” I made a quick-rise dough recipe instead of letting it ferment 3 days, I used volume measurements instead of weight (told you I need that kitchen scale), and I used a supermarket block of mozzarella instead of the wonderful buffalo mozz. But you know what? My pizzas still turned out damn good. And I see this as just the start of an obsession with making great pizzas. Maybe I’ll even start using baker’s percentages and calculating hydration ratios too!

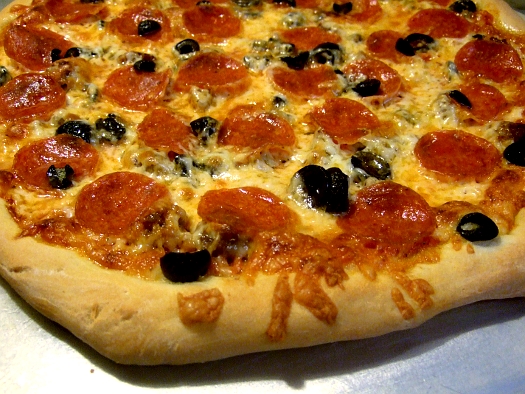
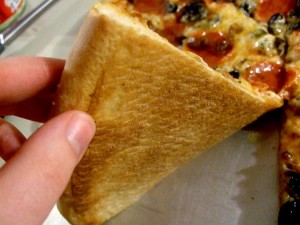
The crust and the sauce are the most important parts of the pizza if you ask me. Either one of those things sucks, and so does your pizza. Cheese and other toppings are basically in the eye of the beholder, so to speak. We did basic pepperoni, Italian sausage and black olive pizzas, with a local cheesemaker’s block part-skim mozz. I plan to make buffalo and BBQ chicken pizzas soon, because I’m a sucker for those things. A pizza stone is ideal, but if you don’t want to spend the money, get yourself a pizza screen. Since I don’t have a peel yet, I started the pizzas on the screen, then transferred them to the stone about 7 minutes into baking. You can cook it on the screen for the entire cooking time if that’s all you have. It’s still much better than a sheet pan or those round perforated pizza pans.

For the sauce, most people on the pizza making forum swear by not cooking the sauce before you cook the pizza. I was a little wary, but it turned out really well. I used a can of imported San Marzano tomatoes, which I had to buy a new brand of because the store was out of the brand I normally buy. I wasn’t too happy with the quality, but it still turned out well. I can’t wait til I have great tomatoes again.

Eventually I’ll start using baker’s percentages, hopefully, but for now here’s an easy beginner’s volume-based recipe. I didn’t measure ingredients for the sauce, but use your best judgement; that’s why you have judgement. It’ll turn out great.

Quick-Rise NY-style Pizza

Crust for one 12-inch pizza:pizza3
1 3/4 c AP flour (high-gluten flour is best, but AP will work in a pinch)
~ 1/2 c water at 90 degrees F
1/2 t salt
1/2 t olive oil
1/2 t active dry yeast, plus a pinch

1. Dissolve salt in water in bowl of mixer fitted with the dough hook. Mix yeast into flour in a bowl.

2. Turn mixer on low, and add flour slowly. Eventually, it will come together around the hook and away from the sides of the bowl. If it doesn’t come together in one mass after a couple minutes, it’s probably too dry. That is the problem with volume measurements. Add more water, a scant teaspoon at a time, until it comes together into a ball. It shouldn’t be sticky, but also not dry to the touch. It just takes intuition. When you think it’s about right, add your olive oil and continue kneading it (the mixer is doing the kneading now) until combined.

3. Coat your hands in olive oil. Remove from the bowl, and knead it a few times on the counter. The olive oil will keep it from sticking to you or the counter, though it shouldn’t really be sticky anyway. If it’s sticky, it’s too wet and you should have added more flour! Bring the dough together into a smooth ball, making sure it’s coated in a thin layer of olive oil before placing it in a bowl. Set aside at room temperature for 2 hours. Dough will double in size.

4. To make pizza, remove dough from the bowl. Pat out on the counter into a round, then you can use your knuckles to stretch it thin. It will naturally have a ring of thicker dough around the edge that will be the crust. I found this dough to be very easy to work with. Transfer to your screen or peel, top with your sauce and toppings and bake at 450 F for 15-17 minutes. If using a stone, preheat the oven for 45 minutes beforehand, and use the lowest rack.

Sauce:pizza2
1 ~28 oz can San Marzano or other quality whole peeled tomatoes
1/2 t dried oregano
1/4 t dried basil
2 T tomato paste
1 clove garlic, minced
1/4 t red pepper flakes
salt to taste

1. Crush the tomatoes by hand into a bowl. Remove any stray skin or fibrous stem parts. Do not add any extra puree or juice from the can.

2. Add the other ingredients except tomato paste, then pulse with a stick blender or in a food processor, blender, or food mill. I used my stick blender and it was quick and easy.

3. At this point, judge the consistency. Mine was pretty thin and watery just from the liquid in the tomatoes. If it’s too thin, strain through a fine seive for a minute or two until the sauce left in the strainer is the right consistency (or slightly thin, the tomato paste will help thicken slightly).

4. Return it to a bowl if you strained it and add the tomato paste. I needed to add some paste because the tomatoes were not the best quality and were obviously not the ripest. The paste made my sauce thicker and brighter. Also, if you taste the sauce, be aware that the raw garlic will not taste good. This was off-putting, but the cook time in the oven took care of that, don’t worry. Let the sauce sit while the dough rises for the flavors to blend.
Share Button

Thai-style Drunken Noodles

drunken

Ah, drunken noodles. No, the noodles themselves aren’t drunk; There’s no alcohol in the dish, contrary to what you may be thinking. Instead, the name refers to the state people are often in when they’re eating these noodles. What drunk doesn’t love garlicky, spicy, salty food?

And really, if you’re not a fan of garlic or chile heat, then don’t make this. Don’t leave out the garlic because your mom doesn’t like it, or only put in half a seeded jalapeno because you don’t like heat. I’m sick of seeing comments on blogs and recipe sites where people explain how they changed numerous major components of a dish before they’d think about trying something. I don’t believe that recipes are gospel, by any means, but you can’t completely omit or change a dish’s major flavor profile. And in this case, that means garlic and chiles (and it could be argued, fish sauce).

Rant aside, this is a super easy and fast meal, great for weeknights. Just make sure to take some breathmints to work the next day.

Drunken Noodles

1 14 oz package of wide rice noodles
6 cloves of garlic, finely chopped or minced through a press
1/4 c Thai chiles, chopped (alternately, use 5-7 serrano chiles if Thai are not available)
1 lb ground chicken or pork
1/3 c fish sauce
1/4 c soy sauce
1/4 c Golden Mountain sauce, or more soy sauce
2 T sugar
2-3 cubanelle or Anaheim peppers, sliced
Thai basil, to taste

1. Cook noodles in boiling water until cooked, but still firm. Time it so the noodles are done the same time as the sauce/meat.

2. Add a little vegetable oil to a wok, then add your ground meat. Stir fry over high heat until done, then add garlic, chiles and peppers. Stir fry until peppers are tender, about 2-3 minutes.

3. Add sauces and sugar, and bring to a simmer. Toss noodles into the wok, and combine with sauce. If needed, cook 1-2 minutes more in the sauce in order to cook noodles to your liking.

4. Serve with chopped Thai basil and extra chiles, if desired.

Share Button

Swedish Meatballs

swedish

Hi everyone, remember me? It’s been a while! I’ve had some technical difficulties with my computer lately. Namely, with my free photo editing program, Gimp. Fo some unknown reason, it keeps crashing on me whenever I try to adjust the levels on any photo. Quite annoying. I’ve even reinstalled it a couple times. Anyone got a copy of Photoshop they’d like to share with me? (Hey, it’s worth a shot!) As it is, I edited this photo at work, since I’ve got all that Adobe goodness there. Shhhhhh! (I’m also having issues now that the sun is setting so early. I have no place to put a makeshift lightbox at the moment.)

IKEA is one of my favorite places. It’s cheap. It’s kitschy. It’s colorful. It’s cheap. Did I mention it’s cheap? Of course, with cheap prices comes cheap manufacturing, but I’ve had the Poang chair for many years and it’s good as new. I’m on my second garlic press from IKEA, though. The little holey part on my first one broke a year ago…The metal actually cracked into pieces. Weird. But I soon got a replacement!

Of course, I eat Swedish meatballs there almost every time. It’s just one of those things you have to do (unless you opt for a giant $1 cinnamon roll instead). Anyone remember when they still had the Manager’s Special? I think it was 9 meatballs, potatoes, a soup and a soda for $5. Ridiculously awesome.

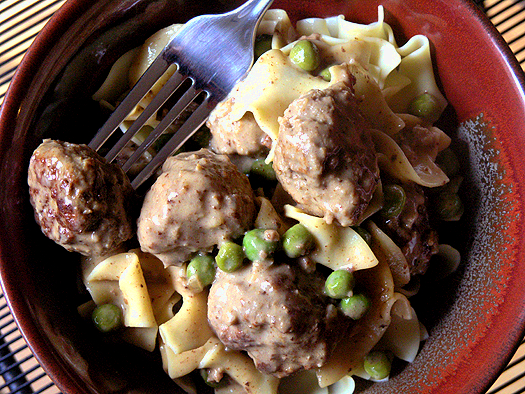
Since I’m not living in Chicago anymore, I hardly ever get to IKEA now. So that meatball craving got pretty strong after a while. And then I ran across a recipe for IKEA-style Swedish meatballs, supposedly translated from a Swedish language IKEA cookbook. Score! And I must say, these turned out better than the frozen, reheated ones you get at the cafe (though, you’ll probably miss the plastic ambiance and tray carts). Instead of potatoes, I like egg noodles. And I mixed in some frozen peas, since you know, somewhat fatty meat on top of starch isn’t exactly the best meal health wise. I didn’t have lignonberries when I made the recipe, but I’m happy to report that since making these, I picked some up at IKEA. Not necessary, but tasty. I imagine Swedish meatballs would also be tasty with leftover cranberry sauce from Thanksgiving.

Swedish Meatballs

3/4 lb lean ground beef
1/2 lb ground pork
1 egg
~1/2 c cream or milk
1 small onion, finely chopped
1/4 c breadcrumbs
2 small potatoes, peeled, boiled, mashed and cooled
1/2 t allspice
oil and butter for frying

For sauce:
1 15 oz can beef broth or stock
2/3-1 c cream
3-4 dashes worchestershire

1. Saute the onion in a small amount of butter until just browning.

2. In a large bowl, combine well all meatball ingredients except beef and pork. Add meats, then mix gently to combine without packing the meat down. Season the mixture generously with salt. You’ll use more than you think you need. If you’re unsure, heat a pan and cook a pinch of the meat to taste, then reseason the mixture. Form into golf ball sized meatballs.

3. Heat oil and butter combination in a large skillet over medium heat, and fry meatballs on all sides until brown and cooked through. You’ll have to work in batches so you don’t crowd the pan. Remove the meatballs from the pan.

4. Remove any excess oil from the pan, then deglaze with the beef broth, scraping the browned bits off the bottom of the pan. Simmer until reduced a bit, then add the cream and worchestershire. Simmer gently until slightly thickened, then season to taste.

5. Add your cooked meatballs to the sauce and heat through. Serve with egg noodles, potatoes, lignonberries, etc.

Share Button

Meat and Potatoes Night

steakpoivre

Nick requested steak and baked potatoes last Saturday night. I’m not the biggest fan of either, frankly. I really have to be in the mood for steak, and baked potatoes have never wowed me. The only real steak-and-potatoes-meal I crave is French-style steak frites from one of my favorite restaurants, Chez Jacques.

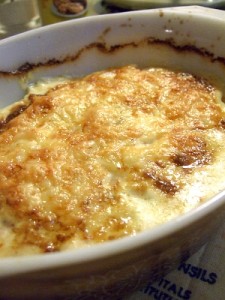
So, to compromise, I made steak au poivre with brandied cream sauce and potatoes gratin with jarlsberg cheese and cream from a local farm. Even if you’re craving a manly man steak and baked potato, how on earth can you say no to that?! Yeah, Nick enjoyed it. So did I, but I think I’m steaked out for the next 6 months or so.

Once again, the steak recipe is adapted from Cook’s Illustrated. The potato recipe is a mish-mash from memory from last Christmas and random recipes online. I don’t remember exactly what recipe I used last year, but it’s pretty difficult to screw up, don’t worry. But whatever you do, don’t underestimate the amount of baking time those potatoes need. I used two smallish Pyrex dishes, and they still needed about an hour and 15 minutes to just cook through. We were impatient, but they could have cooked another 15 minutes longer for a more mashed-potatoes consistency.

Steak au Poivre with Brandied Cream Sauce

Sauce (I almost doubled the amount of sauce the original recipes makes)
4 T butter
2 shallots, minced
2 c beef broth (must be low sodium as it reduces)
1 c chicken broth (also low sodium)
2/3 c heavy cream
2/3 c brandy
2 t lemon juice (I used lime because that’s what I had, no problem)

Steaks
4 strip steaks (or however many you’re serving)
1 T black peppercorns, crushed with the bottom of a heavy pot
salt to season

1. Heat 1 tablespoon butter in 12-inch heavy-bottomed skillet over medium heat; when foaming subsides, add shallot and cook, stirring occasionally, until softened, about 2 minutes. Add beef and chicken broths, increase heat to high, and boil until reduced to about 3/4 cup, about 8 minutes. Set reduced broth mixture aside. Rinse and wipe out skillet.

2. Season the steaks with salt on both sides, then rub and pat the peppercorns evenly onto one side of each steak. Sear on unpeppered side first, then turn and continue cooking until it’s done to your liking. (CI recommends using an instant-read thermometer to check for doneness: 120 degrees for rare, 125 degrees for medium-rare, and 135 to 140 degrees for medium.) When done, place steaks on cutting board and tent with foil until the sauce is done.

3. To make the sauce, pour reduced broth, cream, and  brandy into now-empty skillet; increase heat to high and bring to boil, scraping pan bottom with wooden spoon to loosen browned bits. Simmer until deep golden brown and thick enough to heavily coat back of metal tablespoon or soup spoon, about 5 minutes. Off heat, whisk in remaining 3 tablespoons butter, lemon juice and any accumulated meat juices. Serve immediately over steaks. And don’t forget the bread to sop up the extra sauce!

Potatoes Gratin with Jarlsberg gratin

Yukon gold potatoes, sliced thinly on a mandoline, enough to fill whatever containers you’re using. For two medium Pyrex dishes, I used about 2.5 pounds.
Heavy cream
Chicken broth
Salt and pepper to taste
Freshly grated nutmeg
Jarlsberg or gruyere cheese, grated. I used about half a pound.
Parmesan, grated
1 clove of garlic
Butter

1. Combine cream and chicken broth at about a 2:1 ratio. You’ll want enough to come up about halfway up the sides of your layered potatoes in the pan. Don’t worry about guessing, you can easily just pour a bit more cream or broth over the potatoes if you need to.

2. Season the cream mixture with salt and pepper. Use more salt than you think you’ll need as potatoes love salt. Grate in a small amount of nutmeg.

cream

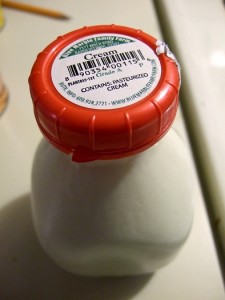
Fantastic cream from a local dairy

3. To prepare your dish, cut the clove of garlic in half and rub it all around the bottom and sides of the dish. Then rub with butter or coat with baking spray.

4. Place a layer of potatoes at the bottom of your dish. You’re aiming for about 3 layers, so use about 1/3rd of your potatoes. Top that with a sprinkling of both cheeses. Use the parmesan sparingly.

5. Keep layering for 3 layers of potatoes, then top with the last of your cheese. Pour the cream mixture over the potatoes and let it soak down into the bottom of the pan, it’ll take a moment. Pour more cream mixture if neccessary to come up about 1/2-2/3 the way up the potatoes. If you tip the dish a bit, you should see a pool of cream. If you don’t have enough of the mixture, just add a bit more cream or broth.

6. Dot the top of the dish with a little butter to help browning. Bake in preheated 350 degree oven, covered, for 30 minutes. Uncover, and continue baking until a knife can be inserted in the middle without resistance. Mine took about an hour and 15 minutes. The top will get golden brown and crunchy.

Share Button

Firecracker Chicken

firecrackerchicken

Happy 4th everyone! Another holiday…and another excuse to try some new recipes that also happen to be pretty unhealthy! But I figure if I do things like fried food only on holidays, that’s not so bad. Right? Right?!…

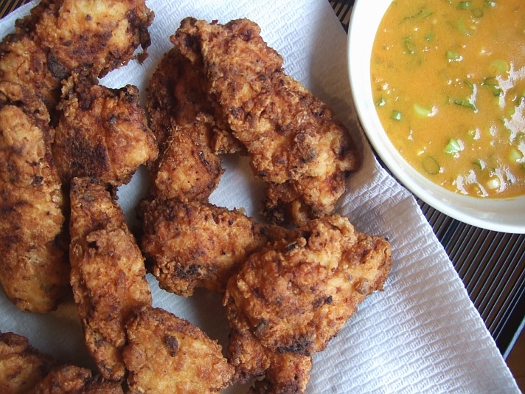
Anyhow, this is a recipe from a Cook’s Illustrated Best of 2008 book I got last year. For some reason it’s not on their web site, so I’ll post an abbreviated version of their usually OCD instructions. Nick and I were originally a little dubious because we’re not big fans of mustard sauce and it seemed a little thousand island dressingy, but it turned out better than we both expected. Nick was hankering for fried chicken and we both love spicy, so there you go. We both also prefer boneless fried chicken to meat on the bone — it just grosses us out picking meat off the bone sometimes. I changed the recipe slightly based on what I had on hand, and it still worked perfectly. None of the coating came away from the chicken as I was frying it, which has been the bane of my existence when it comes to fried chicken in the past.

Firecracker Chicken

Sauce/marinade
1/4 c sliced pickled banana peppers, finely chopped
1/4 c pickling liquid from the banana peppers
1/4 c fresh lime juice
1/4 c yellow mustard
1/4 c veggie oil
1 t mustard powder
1 T sriracha
1 T ketchup
2 T brown sugar
3 cloves garlic, minced
1 habanero, minced
4 green onions, sliced

Chicken
~3 lbs boneless skinless chicken breasts
2 c AP flour
1/2 c cornstarch
1 T salt
1 t baking powder
4 egg whites
canola or veggie oil for frying

1. Combine all ingredients for the sauce/marinade in a bowl and set aside.

2. Pound the chicken until 1/2-inch thick, then cut into strips. Place in a large ziploc bag, add 1/4 c of the sauce and squeeze the bag to coat the chicken. Marinade in the fridge for 1/2 to 2 hours.

3. When chicken has marinaded, combine flour through baking powder in a large bowl. Add 6 tablespoons sauce mixture and combine with your hands until it resembles wet, coarse sand. These clumps will stick to the chicken and make little crunchy parts when you fry it.

4. In another bowl whisk the egg whites until foamy. To coat the chicken, pat each piece dry on a paper towel. Dip in egg whites, let excess drip off. Lay in the coating mixture, cover the piece with coating, then press it into the chicken. Shake off excess coating, then place on a rack or tinfoil. Coat all chicken and let sit for 15 minutes (or refrigerate for up to 4 hours).

5. Heat oil in a large high-sided skillet or Dutch oven over medium-high heat until shimmering (I use an old cast iron skillet with high, straight sides that I love). Fry the strips in batches until browned on both sides, 2-4 minutes per side. Serve with sauce for dipping.

Share Button

Chicken Tikka Masala

masala

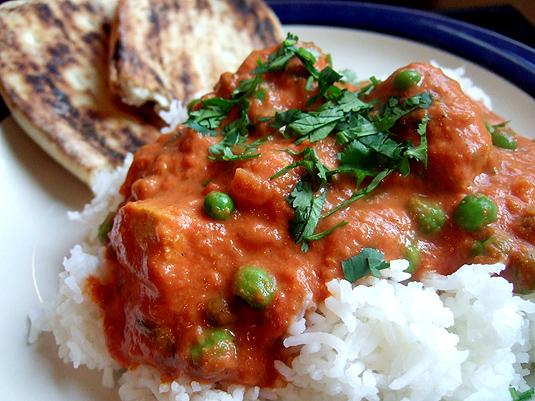
I consider this recipe one of my little victories because Nick actually likes it. I always figured he’d like Indian food (one of my absolute favorite cuisines) because he loves bold, highly spiced and seasoned foods. But the firs time I took him to an Indian restaurant, he didn’t enjoy it at all, really. Then again, my saag wasn’t very good there either, so I hoped it was because it just wasn’t a very good restaurant. I made this one night, and now Nick actually requests it. Success!!

This isn’t exactly very authentic, but since when is a dish often called “butter chicken” considered authentic anyway? I used a Cooks Illustrated recipe as a starting point, but then I mostly wing the spices from there. I don’t use any pre-blended spices (garam masala or the like), even though that might be a bit easier if I found a blend I enjoyed. I find it’s just as easy to pour the ground spices in a bowl first, keeping the genera ratios of spices the same for each batch. Sometimes I might add more cinnamon if I feel like it, sometimes more cumin, etc. I’d say that I easily doubled the amount of spices called for in the original CI recipe, though.

Also not traditional, I add a bunch of frozen peas right at the end of cooking. I usually don’t make a side dish with this (besides some naan from Trader Joe’s), so I’d feel guilty if I didn’t some kind of veggie in there somewhere. Feel free to add some potatoes to this dish to stretch the chicken and make it a little more economical as well. I’ll do my best on the spice quantities, but since I don’t measure them, they’re just guestimations. Go by your taste and add more as you go along.

Chicken Tikka Masala

Chicken/marinade:
2 lbs chicken breasts of combo breasts and thighs
1 c plain yogurt
2 T fresh grated ginger
2 cloves garlic, minced
1 t cumin
1 t coriander
1/2 t cayenne

Masala:
2 28-oz cans crushed tomatoes (I love Dei Fratelli)
1 large onion, diced
3 cloves garlic
2 t fresh grated ginger
3-5 serrano chiles, chopped
~2 T coriander
~1 T cumin
~2 t cardamom
~1 t cinnamon or one cinnamon stick
~1/2 t black pepper
~1 t cayenne
~ 1/2 t tumeric
1 c heavy cream
12 oz frozen peas
cilantro, chopped, to taste

1. Cube chicken into large chunks and combine with other ingredients in a plastic bag. Marinate 1-2 hours.

2. Heat butter or olive oil in a large skillet or Dutch oven over medium heat. Add onions, chiles, garlic and ginger and saute until soft. Add dry spices and toast until fragrant, about 1 minute.

3. Add chicken to pan directly from marinade, letting excess drip off. Cook 7-9 minutes over medium, until browned in some spots, but without letting the spices burn. The yogurt will sort of caramelize and give a nice fond with the spices. The chicken will not be fully cooked.

4. Add tomatoes, stir well and simmer for 20 minutes over medium-low. Taste, season with salt and adjust other seasonings as you like.

5. Stir in cream, peas and cilantro. Bring back up to heat before serving over basmati rice and naan.

Share Button

Bucatini all’Amatriciana

bucatini1

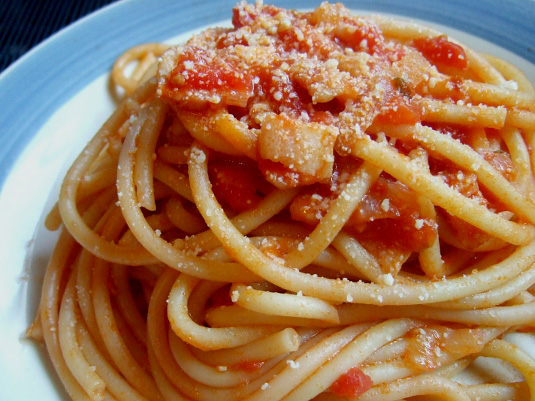
This is a case of do as I say, not as I do. (Though, if you do as I do, it’ll still turn out extremely tasty.) Traditionally, this is made with guanciale or pancetta, but I used leftover bacon from carbonara a couple weeks ago (which, coincidentally, should also include guanciale or pancetta over bacon). If you can’t find, or don’t want to bother using either of those, just use bacon. Traditionally, this recipe calls for romano cheese, but I use parmesan because I always have it on hand. It’s still good, just not authentic.

I love this pasta because it’s one of those Italian dishes that’s so simplistic. A few ingredients, a quick pan sauce, and dinner’s ready. The quality of those ingredients really matters though, so don’t skimp and use Kraft cheese or crappy canned tomatoes.

Unfortunately, while I love this for it’s simplicity, Nick finds it boring and lacking in the meat department. But don’t listen to him, this is perfect for summertime when it’s hot out and you want something fresh tasting that won’t heat up the kitchen for hours on end. You can easily keep all of the necessary ingredients on hand for a quick, cheap meal.

Bucatini — a fat strand of spaghetti that’s hollow like a straw — isn’t necessary, but we both enjoyed it. Takes you by surprise when your first instinct is to slurp like spaghetti, but it doesn’t work because of the hole!

Bucatini all’Amatriciana

1 lb bucatini or spaghetti
1/2 lb guanciale, pancetta or bacon, in 1/2 inch chunks or strips
1 large white onion, slicedbuc
3 cloves garlic, minced
1 t red pepper flakes
28-32 oz can whole tomatoes (preferably San Marzano)
Pecorino romano or parmesan cheese, for serving

1. Cook pasta according to package directions.

2. While the pasta water is coming to a boil, saute onions in a bit of olive oil over medium heat until slightly soft, about 3 minutes. Add garlic, red pepper flakes and guanciale, pancetta or bacon and continue to cook over medium heat until meat is rendered and becoming slightly crisp on the edges, 6-8 minutes more.

3. Add canned tomatoes and juice, breaking tomatoes up with your hands. Simmer until pasta is done, at least 8 minutes. Season with salt and pepper.

4. Combine sauce and hot drained pasta. Serve topped with romano or parmesan cheese.

Share Button