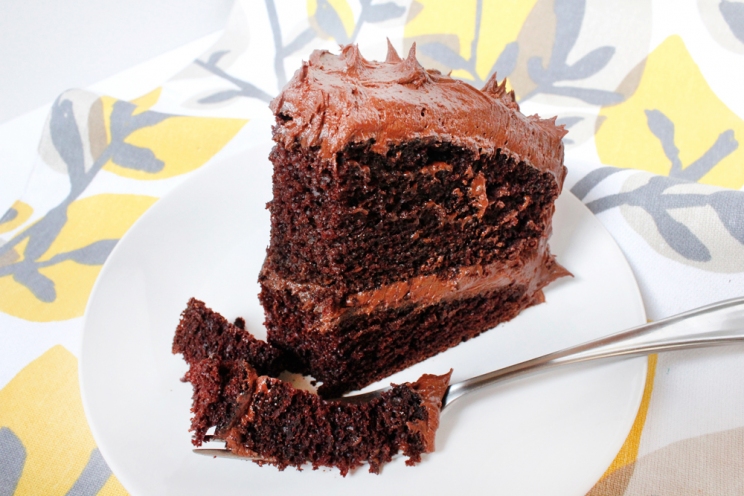
Double Chocolate Layer Cake

chocolatecake3

This is a great everyday cake. Because other people make cakes just because, right? It’s also a great birthday cake, retirement cake, anniversary cake, Valentine’s Day cake, Arbor Day cake, Brewers finally won today cake, you had a hard day at work cake… See, you can come up with a cake reason any day of the year. Plus, this cake is so easy to make. Mix dry ingredients, dump in wet, mix. That’s it.

For me, it’s only made from pantry ingredients that I normally have on hand anyway, so I really can bake it up whenever the mood strikes for chocolate. The cakes bake up light and springy with a high dome. Most people cut off the dome to even it out for easier layering, but to me that’s just wasted cake. I just keep the dome and fill in where I need to with extra frosting glue. Plus I don’t care how it looks when it’s done; if it’s domed on top, fine, just means more cake. If you’re feeling fancy, cut that dome off.

Continue reading

Share Button

My Favorite Chocolate Chip Cookies

chocolatechip3

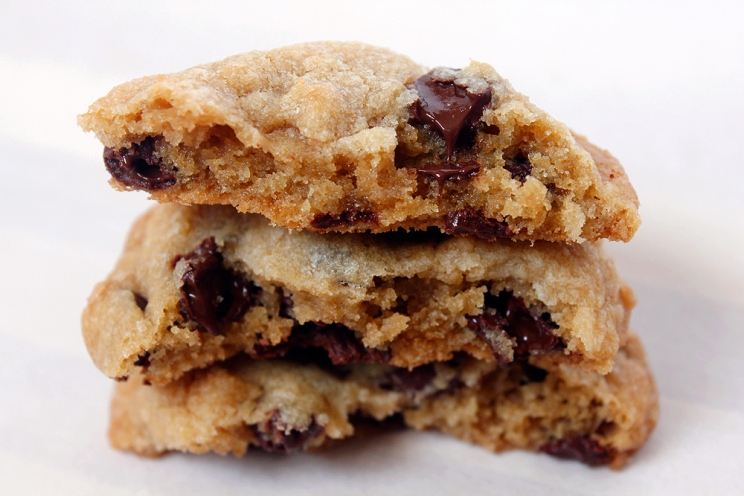
Forget apple pie, chocolate chip cookies should be America’s iconic baked good. Everyone loves them, you can get them anywhere, and they’re easier to make than apple pie. 

This is my favorite chocolate chip cookie recipe. It uses browned butter to impart a toffee-like flavor that you generally only get from aging the dough in the fridge for a day or so (as started by the NYT famous recipe). While I’m sure that recipe is pretty damn delicious, I never plan ahead to make cookies. When I want chocolate chip cookies, I need them NOW. Maybe other people can plan ahead for their cravings, but not me. (That is also why my most common brownie-baking time is midnight.)

Continue reading

Share Button

Late Summer Lobster Salad

lobster

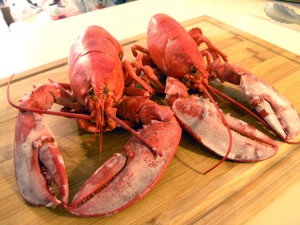
I’ve never cooked whole, live lobsters before. So when the local high-end grocery store, Sendik’s, had a one-day lobster sale, I figured it’d be a great time to try! $10 live ~1 lb lobsters. Awesome. I even avoided the first-come-first-serve fiasco by reserving them the day before.

My friend Lynn was having a cookout the next day, so I decided to use the lobsters in a dish to bring. It being late summer, there was plenty of gorgeous produce available at the farmer’s market, so I decided to make a lobster salad with sweet corn, tarragon and orange cherry tomatoes. And as another first, I made the mayonnaise from scratch. Because if you’re going to spend $20 on lobsters for a salad, you better make sure you use awesome ingredients with it!

The mayonnaise is an Alton Brown recipe, and was pretty easy. I initially used my immersion blender, and everything was going swimmingly until the emulsion decided to break about halfway through adding the oil. I have no idea what happened, but I switched to the old fashioned bowl and whisk for the next attempt. Of course, that worked perfectly, even if I had to ask Nick to hold the bowl steady for me while I whisked and added oil.

I was also hoping to have lobster fights on my kitchen floor, but alas, one of the lobsters was almost dead by how lethargic he was. So they simply went in the pot as soon as I brought them home. (I admit I was tempted to name one Pinchy and make him my pet and grow him until I accidentally cooked him in a too-hot bath, but that’s another story).

I served the salad on top of some crusty baguette slices that I drizzled with olive oil and toasted in the oven. I’m sure it’d be good on salad greens, as a lobster roll (though a complicated, sacrilegious one), in pita bread, or eaten with a fork straight from the bowl as I did with the leftovers!

Late Summer Lobster Salad

2 1lb live lobsters, cooked your preferred method (I chose to steam instead of boil)
2 ears of fresh sweet corn
1 large handful of orange cherry tomatoes, straight from the garden
1/4 c minced red bell pepper
2 TB fresh minced tarragon
1 TB minced chives
2-3 TB homemade mayonnaise, or to taste (see recipe below)
S+P to taste

1. Remove the meat from the cooked lobsters. I even lined up the little lobster legs and used a rolling

Say hello to my little friends

Say hello to my little friends

pin to smoosh the meat out of them. I don’t waste lobster! Roughly chop the meat and try not to eat it all while doing so.

2. Remove the corn from the cob. Quarter or halve the cherry tomatoes, depending on size.

3. Combine the lobster, veggies, herbs and mayonnaise and mix gently to combine. Season with salt and pepper. Simple and delicious!

AB’s Mayonnaise

1 egg yolk
1/2 t salt
1/2 t dry mustard
2 pinches sugar
2 t fresh lemon juice
1 TB white wine vinegar
1 c oil, safflower, corn, or canola

1. Whisk together the egg yolk and the dry ingredients. Whisk in half the lemon juice and vinegar.

2. Whisking quickly, add oil a few drops at a time until an emulsion forms and it becomes thickened and lighter. Then keep whisking while you add half of the oil in a thin steady stream. Add the rest of the lemon juice a vinegar, then continue adding the oil slowly until it is all incorporated.

Share Button

Peanut Butter Brownies

pbbrownies

I probably don’t need to say it, but holy decadent, batman!

I had these beautiful brownies bookmarked over at Loves to Eat for the longest time, just waiting for an excuse to make them. I figured Labor Day, and specifically my friend Lynn’s party, was good enough for me. As an added bonus, other people would be at this party, ensuring I wouldn’t eat the entire pan myself. Thanks, other people.

These remind me of the chocolate peanut butter cake I’ve made, but with much less effort and time expenditure. But the payoff is still awesome. The brownie base is super fudgey and rich, so I cut these into 24 squares and one is plenty (at least for a couple hours!). The peanut butter filling is really just frosting, which works for me. And the topping originally didn’t call for any cream, but I wanted something that wouldn’t set up as a hard layer, and adding a bit of cream to make a ganache worked out perfectly. The peanut butter layer is soft and silky and the ganache is smooth but still a bit soft, even from the fridge.

Make these. You know you want to.

Peanut Butter Brownies

Brownie layer
1 c butter
2 c sugar
3 eggs
3 t vanilla
2/3 c cocoa powder (Dutch process is fine)
1 c AP flour
1/2 t salt
1/2 t baking powder

PB filling
1/2 c butter, softened
1/2 c creamy peanut butter
2 c powdered sugar
~2 t milk

Ganache topping
1/4 c peanut butter
2 c semisweet chocolate chips
1/4 c butter
1/4 c cream

1. Preheat oven to 350. Line a 9×13 pan with aluminum foil to make a sling, or use parchment, and coat with cooking spray. I only used a heavy dose of cooking spray, and that still wasn’t enough for these fudgey brownies, so I recommend lining the pan for once.

2. For the brownies, melt the butter in a large saucepot. Remove from heat, add the sugar and stir to combine. Beat in eggs and vanilla until homogeneous. Add cocoa, baking powder and salt and combine. Add flour last and stir until combined. Spread into pan and bake 25-30 minutes. Cool completely before frosting.

3. For peanut butter filling/frosting, combine the ingredients and beat until smooth. Add more milk if necessary to make it spreadable. Try not to eat all the frosting before your brownies are cool.

4. For the ganache, combine the ingredients in a double boiler or in a microwave safe bowl. Melt together and combine.

5. Once the brownies are cool, spread the frosting on top. Place them in the fridge for at least 30 minutes until the frosting sets up a bit. Pour the ganache over the top and spread gently. Return to the fridge until set. I like to keep them in the fridge and serve cold because the brownies are so fudgey.

Share Button

Meat and Potatoes Night

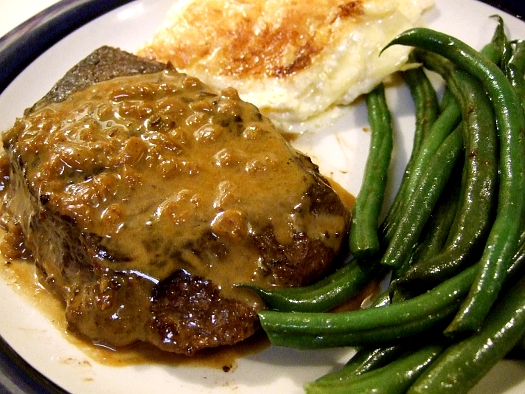
steakpoivre

Nick requested steak and baked potatoes last Saturday night. I’m not the biggest fan of either, frankly. I really have to be in the mood for steak, and baked potatoes have never wowed me. The only real steak-and-potatoes-meal I crave is French-style steak frites from one of my favorite restaurants, Chez Jacques.

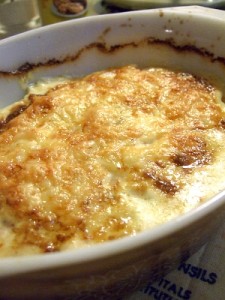
So, to compromise, I made steak au poivre with brandied cream sauce and potatoes gratin with jarlsberg cheese and cream from a local farm. Even if you’re craving a manly man steak and baked potato, how on earth can you say no to that?! Yeah, Nick enjoyed it. So did I, but I think I’m steaked out for the next 6 months or so.

Once again, the steak recipe is adapted from Cook’s Illustrated. The potato recipe is a mish-mash from memory from last Christmas and random recipes online. I don’t remember exactly what recipe I used last year, but it’s pretty difficult to screw up, don’t worry. But whatever you do, don’t underestimate the amount of baking time those potatoes need. I used two smallish Pyrex dishes, and they still needed about an hour and 15 minutes to just cook through. We were impatient, but they could have cooked another 15 minutes longer for a more mashed-potatoes consistency.

Steak au Poivre with Brandied Cream Sauce

Sauce (I almost doubled the amount of sauce the original recipes makes)
4 T butter
2 shallots, minced
2 c beef broth (must be low sodium as it reduces)
1 c chicken broth (also low sodium)
2/3 c heavy cream
2/3 c brandy
2 t lemon juice (I used lime because that’s what I had, no problem)

Steaks
4 strip steaks (or however many you’re serving)
1 T black peppercorns, crushed with the bottom of a heavy pot
salt to season

1. Heat 1 tablespoon butter in 12-inch heavy-bottomed skillet over medium heat; when foaming subsides, add shallot and cook, stirring occasionally, until softened, about 2 minutes. Add beef and chicken broths, increase heat to high, and boil until reduced to about 3/4 cup, about 8 minutes. Set reduced broth mixture aside. Rinse and wipe out skillet.

2. Season the steaks with salt on both sides, then rub and pat the peppercorns evenly onto one side of each steak. Sear on unpeppered side first, then turn and continue cooking until it’s done to your liking. (CI recommends using an instant-read thermometer to check for doneness: 120 degrees for rare, 125 degrees for medium-rare, and 135 to 140 degrees for medium.) When done, place steaks on cutting board and tent with foil until the sauce is done.

3. To make the sauce, pour reduced broth, cream, and  brandy into now-empty skillet; increase heat to high and bring to boil, scraping pan bottom with wooden spoon to loosen browned bits. Simmer until deep golden brown and thick enough to heavily coat back of metal tablespoon or soup spoon, about 5 minutes. Off heat, whisk in remaining 3 tablespoons butter, lemon juice and any accumulated meat juices. Serve immediately over steaks. And don’t forget the bread to sop up the extra sauce!

Potatoes Gratin with Jarlsberg gratin
Yukon gold potatoes, sliced thinly on a mandoline, enough to fill whatever containers you’re using. For two medium Pyrex dishes, I used about 2.5 pounds.
Heavy cream
Chicken broth
Salt and pepper to taste
Freshly grated nutmeg
Jarlsberg or gruyere cheese, grated. I used about half a pound.
Parmesan, grated
1 clove of garlic
Butter

1. Combine cream and chicken broth at about a 2:1 ratio. You’ll want enough to come up about halfway up the sides of your layered potatoes in the pan. Don’t worry about guessing, you can easily just pour a bit more cream or broth over the potatoes if you need to.

2. Season the cream mixture with salt and pepper. Use more salt than you think you’ll need as potatoes love salt. Grate in a small amount of nutmeg.
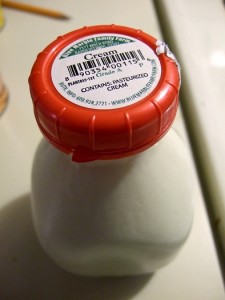
cream

Fantastic cream from a local dairy

3. To prepare your dish, cut the clove of garlic in half and rub it all around the bottom and sides of the dish. Then rub with butter or coat with baking spray.

4. Place a layer of potatoes at the bottom of your dish. You’re aiming for about 3 layers, so use about 1/3rd of your potatoes. Top that with a sprinkling of both cheeses. Use the parmesan sparingly.

5. Keep layering for 3 layers of potatoes, then top with the last of your cheese. Pour the cream mixture over the potatoes and let it soak down into the bottom of the pan, it’ll take a moment. Pour more cream mixture if neccessary to come up about 1/2-2/3 the way up the potatoes. If you tip the dish a bit, you should see a pool of cream. If you don’t have enough of the mixture, just add a bit more cream or broth.

6. Dot the top of the dish with a little butter to help browning. Bake in preheated 350 degree oven, covered, for 30 minutes. Uncover, and continue baking until a knife can be inserted in the middle without resistance. Mine took about an hour and 15 minutes. The top will get golden brown and crunchy.
Share Button

Pumpkin Piecakes, Pecan Brittle and Stabilized Whipped Cream

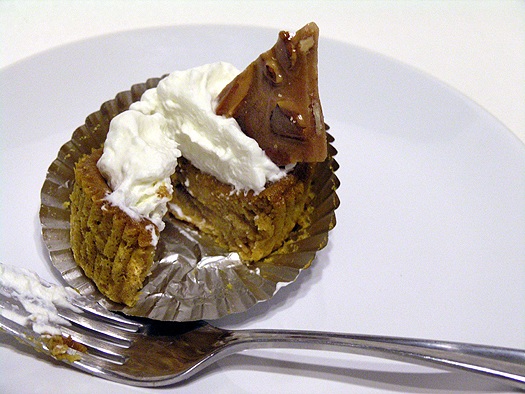
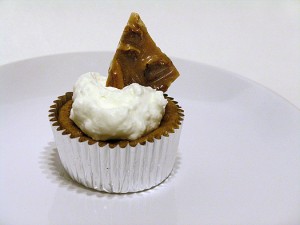
I wasn’t really sure what to call these. Pumpkin pie cupcakes is clumsy and implies a cupcake, which this really isn’t, except for the liner. This is more like a pumpkin pie without the crust. It’s pumpkin pie filling, with a little bit of flour to hold it together and leavener for just a bit of airiness. The edges set up into almost a cake, and the middle stays custardy. And because they fall in the center as soon as you take them out of the oven, they’re just begging for a dollop of whipped cream.

I made these for a work potluck because, having made them before, I knew they were easy to make and perfect for grab-and-go. The only problem was the whipped cream, which would have wept if I made it the night before. So that brings us to the stabilized whipped cream. It was the first time doing so, and I don’t believe I dissolved the gelatin completely before adding it, because there were a few little pearls of gelatin here and there. I doubt anyone but me noticed, though! It didn’t weep, though, so that was ultimately a success.

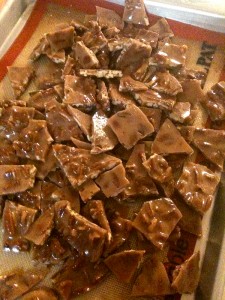
The pecan brittle was just a little extra something. And boy was it good. I debated using pumpkin seeds, but they were the same price as pecans, and frankly I couldn’t see myself using the leftover pumpkin seeds. So pecans it was. And what a good decision that was! The smell as you’re making the brittle is exactly like pecan pie. The smell is almost better than the finished candy, if you ask me!

I adapted the pumpkin recipe from this blog, but made a few key changes. First, I omitted the generic pumpkin pie spice in favor of my own spice blend. Second, I extended the baking time, because 20 minutes really left you with a mushy product. Yes, it’s custardy, but it should still be firm. Also, don’t be afraid of filling your cupcake liners almost full. Normally that’s a bad idea, but these puff only slightly, and more importantly, fall quite a bit when cooling.

Pumpkin Piecakes

1 15 oz can pumpkin puree
1/2 c sugar
1/4 c brown sugar
2 eggs
1 t vanilla
3/4 c half and half
2/3 c AP flour
1/4 t baking powder
1/4 t baking soda
1  t cinnamon
1/2 t ground ginger
1/4 t each allspice, cardamom, freshly grated nutmeg and salt

1. Preheat oven to 350. Line muffin tin with liners and coat lightly with cooking spray.

2. In a Kitchenaid or large bowl with a whisk, combine eggs and sugars. Add pumpkin, half and half and vanilla and combine.

3. Add your dry ingredients, and combine until smooth.

4. Fill liners almost full, then bake for 23-26 minutes until the top is no longer sticky to the touch. Cool, and serve with whipped cream. Makes a dozen.


Stabilized Whipped Cream

1 t unflavored gelatin
4 t cold water
1 c heavy whipping cream
powdered sugar to taste

1. Add gelatin to cold water in small saucepan and bloom until thick.

2. Cook over low heat until gelatin is completely melted and there are no little pearls of gelatin left. Cool slightly.

3. Whip cream until slightly thick, then pour gelatin into it while whipping slowly.

4. Add sugar to taste, then continue to whip until stiff.


Pecan Brittle

1 1/2 c sugar
1/2 c light corn syrup
2 1/4 c roasted, lightly salted pecans
2 T butter
1 t vanilla
1 t baking soda

1. Prepare the pan you will be pouring the candy into. Use a half sheet pan, or other large sheet pan with low sides. Use silpat if you have it, otherwise coat the pan with cooking spray or butter.

2. In a heavy saucepan or enameled dutch oven with a lid, combine the sugar, water and corn syrup. Cover the pot and bring to a boil over high heat. Swirl the pot occasionally to ensure the sugar melts evenly. Keeping the lid on will cause the steam to condense and drip back down the sides of the pot, preventing any sugar from recrystalizing. If you have no lid or crystals form, you can also wipe down the sides of the pot with water using a pastry brush.

3. Once boiling, insert candy thermometer and boil until it reaches 230 degrees, only about a minute later.

4. Add the pecans and stir constantly with a metal or silicon spatula until it reaches 300 degrees, about 15-18 minutes.

5. Remove from the heat, and immediately add the butter, vanilla and baking soda and stir quickly. It will foam and sizzle.

6. Pour down the center of your pan and spread out so the nuts are in an even layer. Let sit until cool, and break into pieces.

Share Button

Black Bottom Cupcakes

blackbottomcupcake

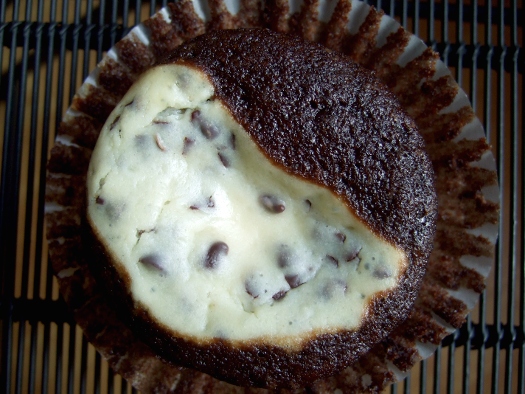
This recipe brings together two great things: cupcakes and cheesecake. And it’s got lots of other things going for it, too. The cheesecakey part adds enough moisture and creaminess that you don’t need frosting, eliminating the extra frosting steps. Plus I didn’t even use the Kitchen Aid for this one, just a quick blend with my hand mixer for the cream cheese and a good old fashioned wooden spoon for the batter. Couldn’t be easier. Found the recipe on allrecipes.com.

Black Bottom Cupcakes

1 8 oz package cream cheese, softened
1 egg
1/3 c sugar
1/8 t salt
1 c miniature semisweet chocolate chips
1 1/2 c all-purpose flour
1 c sugar
1/4 c cocoa powder
1 t baking soda
1/2 t salt
1 c water
1/3 c vegetable oil
1 T cider vinegar
1 t vanilla extract

1. Preheat oven to 350 degrees F. Line muffin tins with paper cups or lightly spray with non-stick cooking spray.

2. In a medium bowl, beat the cream cheese, egg, 1/3 cup sugar and 1/8 teaspoon salt until light and fluffy. Stir in the chocolate chips and set aside.

3. In a large bowl, mix together the flour, 1 cup sugar, cocoa, baking soda and 1/2 teaspoon salt. Make a well in the center and add the water, oil, vinegar and vanilla. Stir together until well blended. Fill muffin tins 1/3 full with the batter and top with a dollop of the cream cheese mixture.

4. Bake in preheated oven for 25 to 30 minutes.

Share Button

The Best, Most Decadent Cake Ever

cake2

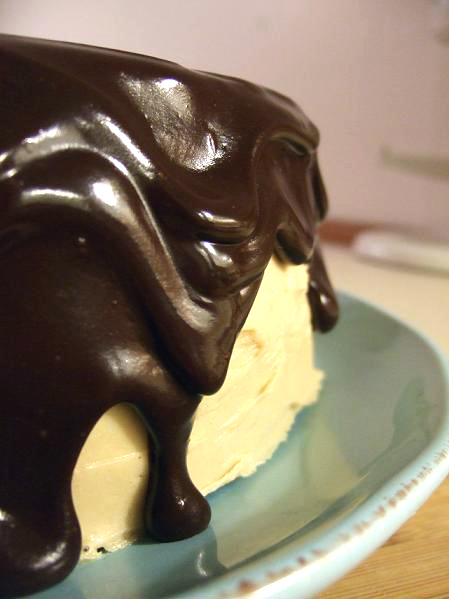
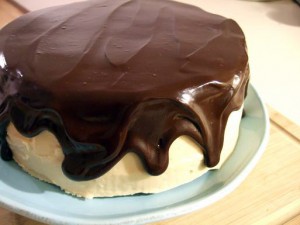
I mean, just look at it. You can’t argue with that.

I made this cake for Nick’s birthday. He’s a pb and chocolate kinda guy…although he has been getting slightly sick of the combination lately, as I’ve been making a ton of pb+c baked goods. Oops.

This recipe is shamelessly stolen from SmittenKitchen.com, one of my favorite food blogs. Please, make this cake. It’s as tasty as it is gorgeous.

cakeChocolate Peanut Butter Cake

2 cups all-purpose flour
2 1/2 cups sugar
3/4 cup unsweetened cocoa powder, preferably Dutch process
2 teaspoons baking soda
1 teaspoon salt
1 cup neutral vegetable oil, such as canola, soybean or vegetable blend
1 cup sour cream
1 1/2 cups water
2 tablespoons distilled white vinegar
1 teaspoon vanilla extract
2 eggs

1. Preheat the oven to 350 degrees F. Butter the bottoms and sides of three 8-inch round cakepans. Line the bottom of each pan with a round of parchment or waxed paper and butter the paper.

2. Sift the flour, sugar, cocoa powder, baking soda, and salt into a large bowl. Whisk to combine them well. Add the oil and sour cream and whisk to blend. Gradually beat in the water. Blend in the vinegar and vanilla. Whisk in the eggs and beat until well blended. Scrape down the sides of the bowl and be sure the batter is well mixed. Divide among the 3 prepared cake pans.

3. Bake for 30 to 35 minutes, or until a cake tester or wooden toothpick inserted in the center comes out almost clean. Let cool in the pans for about 20 minutes. Invert onto wire racks, carefully peel off the paper liners, and let cool completely.

4. To frost the cake, place one layer, flat side up, on a cake stand or large serving plate. Spread 2/3 cup cup of the Peanut Butter Frosting evenly over the top. Repeat with the next layer. Place the last layer on top and frost the top and sides of the cake with the remaining frosting.

5. To decorate with the Chocolate–Peanut Butter Glaze, put the cake plate on a large baking sheet to catch any drips. Simply pour the glaze over the top of the cake, and using an offset spatula, spread it evenly over the top just to the edges so that it runs down the sides of the cake in long drips. Refrigerate, uncovered, for at least 30 minutes to allow the glaze and frosting to set completely. Remove about 1 hour before serving.

Peanut Butter Frosting
Makes about 5 cups

10 ounces cream cheese, at room temperature
1 stick (4 ounces) unsalted butter, at room temperature
5 cups confectioners’ sugar, sifted
2/3 cup smooth peanut butter, preferably a commercial brand (because oil doesn’t separate out)

1. In a large bowl with an electric mixer, beat the cream cheese and butter until light and fluffy. Gradually add the confectioners’ sugar 1 cup at a time, mixing thoroughly after each addition and scraping down the sides of the bowl often. Continue to beat on medium speed until light and fluffy, 3 to 4 minutes.

2. Add the peanut butter and beat until thoroughly blended.

Chocolate-Peanut Butter Glaze
Makes about 1 1/2 cups

8 ounces seimsweet chocolate, coarsely chopped
3 tablespoons smooth peanut butter
2 tablespoons light corn syrup
1/2 cup half-and-half

1. In the top of d double boiler or in a bowl set over simmering water, combine the chocolate, peanut butter, and corn syrup. Cook, whisking often, until the chocolate is melted and the mixture is smooth.

2. Remove from the heat and whisk in the half-and-half, beating until smooth. Use while still warm.

A couple tips: The cakes are very, very fragile. Chill them before frosting and assembling. Also chill the frosted cake before you glaze it, so that the glaze hardens in suspended motion down the side of the cake. Yum.

Share Button